
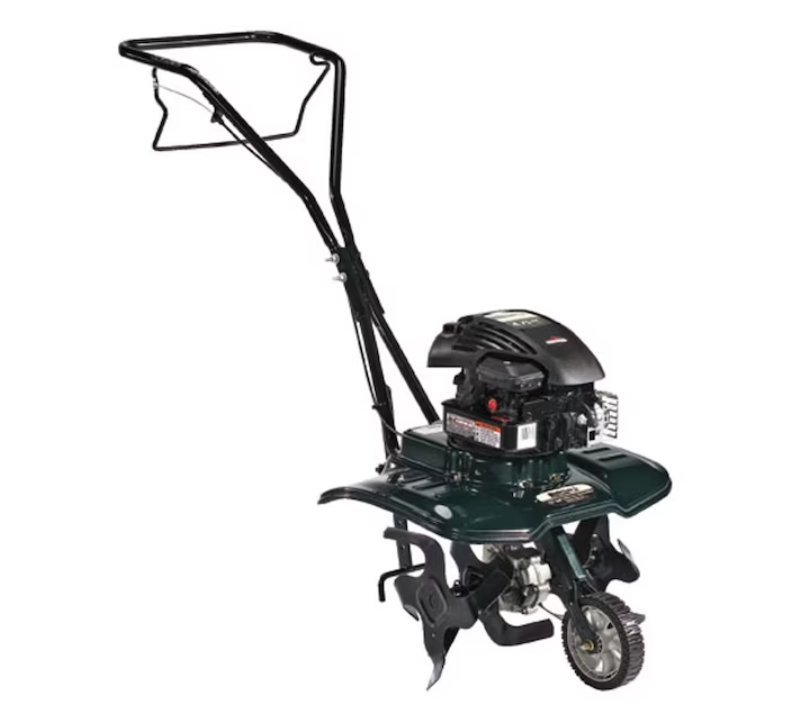
Bolens BL250 158-cc 24-in Front-Tine Forward-rotating Tiller
- Great for preparing areas of your lawn for seeding or re-seeding
- Adjustable tilling widths between 13″ and 24″ give you the versatility to fit between rows or cover wider areas
- Forward rotating tines are ideal for established gardens
$449.00
After fifteen years of transforming countless gardens and breaking countless grounds, I’ve developed what my friends call an “unhealthy obsession” with garden tillers. But let me tell you something—when you’ve seen a barren patch of stubborn clay transform into a thriving vegetable garden because you had the right equipment, you’d be obsessed too. Today, I’m sharing everything I know about one of the most reliable workhorses in the garden tool shed: the Bolens Tiller.
The Beginning of My Tiller Journey
I still remember my first garden. A small 10×10 plot behind my starter home that I attacked with nothing but enthusiasm and a cheap shovel. Three blisters and a sore back later, I had barely turned over a quarter of the soil. That weekend, my neighbor took pity on me and introduced me to his Bolens Tiller. Within an hour, we had prepped the entire garden bed, and I was sold. The right tiller doesn’t just save your back—it completely transforms your relationship with your garden.
What Exactly Is a Bolens Tiller and What Can It Do?
For the uninitiated, a Bolens Tiller is a motorized garden tool designed to break up, turn over, and aerate soil. But calling it just that feels like describing a Swiss Army knife as “something that cuts things.” A quality Bolens Tiller is the foundation of any serious gardening effort.
These machines excel at:
- Breaking up compacted soil and clay
- Incorporating compost and amendments into your garden
- Preparing seedbeds for planting
- Removing and controlling weeds
- Aerating soil around established plants
- Creating trenches for irrigation or planting
I’ve used mine for everything from preparing my vegetable garden each spring to incorporating leaves into my compost pile in the fall. One year, I even used it to mix concrete for a small garden path (though I don’t officially recommend this—the rental store wasn’t too pleased).
The Anatomy of a Bolens Tiller: Features That Matter
Over the years, Bolens has built a reputation for reliable tillers that combine power with user-friendly features. While models vary, most Bolens Tillers share several key components that contribute to their performance:
Engine Power
Bolens Tillers typically come equipped with 4-cycle engines ranging from 140cc to 208cc. After testing numerous models, I’ve found that for average home gardens, the 140cc engine provides sufficient power while being more fuel-efficient. However, if you’re dealing with virgin soil or particularly stubborn clay, the extra muscle of a 208cc engine makes a noticeable difference.
Tine Design and Configuration
The tines—those rotating metal blades that do the actual digging—come in various configurations. Bolens typically uses heat-treated steel tines that resist bending and dulling. Most models offer tilling widths between 12-24 inches, which you can adjust depending on your needs.
I remember the first time I tried to squeeze between my raised beds with a 24-inch tiller. Let’s just say I learned quickly about the importance of matching tiller width to your garden layout.
Depth Adjustment
Quality Bolens Tillers allow you to adjust the tilling depth, typically between 1-8 inches. This versatility is crucial—shallow tilling for weed control, deep tilling for breaking new ground.
Drive System
Most Bolens models feature a chain-drive system that transfers power efficiently from the engine to the tines. While chain drives require more maintenance than gear drives, they tend to handle tough conditions better in my experience.
User Comfort Features
Look for ergonomic handles with cushioned grips, easy-to-reach controls, and adjustable handle heights. These features might seem minor until you’re on hour three of tilling a large garden plot.
Front-Tine vs. Rear-Tine: The Great Bolens Debate
One of the most common questions I get from gardening novices is about the difference between front-tine and rear-tine tillers. Both have their place, and Bolens makes excellent versions of each.
Front-Tine Bolens Tillers
Front-tine tillers have their tines positioned in front of the wheels. They’re generally:
- Lighter and more maneuverable
- Less expensive
- Better for already-worked soil
- Easier to store due to smaller size
- Perfect for smaller gardens and tight spaces
I use my front-tine Bolens for maintenance tilling between established plants and quick jobs around the garden.
Rear-Tine Bolens Tillers
Rear-tine models position the tines behind the wheels, which offers several advantages:
- More stability and better balance
- Greater digging power for tough soil
- Less operator fatigue (they pull themselves forward)
- Better suited for breaking new ground
- Ideal for larger garden areas
My rear-tine Bolens has been indispensable for establishing new garden beds and working with our notorious clay soil. For serious gardening in challenging conditions, a rear-tine Bolens Tiller is worth every penny of its higher price tag.
Getting Started: How to Assemble Your New Bolens Tiller
I’ll never forget the excitement of unboxing my first Bolens Tiller—followed immediately by the dread of looking at what seemed like hundreds of parts. But the process is actually straightforward if you follow these steps:
- Unpack all components and check against the parts list
- Attach the handle assembly to the main body using the provided bolts
- Install the depth stake and drag bar
- Connect the throttle cable to the engine
- Attach the tine shields if included
- Add oil to the engine (very important—most tillers ship without oil!)
- Check all fasteners for tightness before operation
The owner’s manual will have specific instructions for your model, but I’ve found that assembly typically takes less than an hour, even for someone with basic mechanical skills. Just be sure to tighten all connections properly—a loose bolt can quickly turn your tilling session into a repair session.
Firing It Up: Starting Your Bolens Tiller
Starting a Bolens Tiller is straightforward, but there’s definitely a technique to it. For most models, follow this procedure:
- Check oil and fuel levels
- Move the throttle to the “start” position
- Set choke to “full” for cold starts
- Turn the engine switch to “on”
- For electric-start models, turn the key or press the start button
- For pull-start models, give the cord a firm, smooth pull
- Once running, gradually move the choke to “run” position
- Allow the engine to warm up for 1-2 minutes before engaging the tines
The first time I started my Bolens, I made the rookie mistake of yanking the pull cord like I was trying to start a lawnmower from the 1950s. The proper technique is a smooth, firm pull from a slightly bent position—your back will thank you.
Fuel and Oil: Keeping Your Bolens Running Smoothly
Bolens Tillers typically use standard unleaded gasoline with an octane rating of 87 or higher. I’ve found that using fuel stabilizer, especially during the off-season, prevents many starting problems.
For oil, most Bolens Tillers require SAE 30 weight oil for temperatures above 40°F, or 10W-30 for variable temperatures. Always check your specific model’s requirements, but generally:
- Oil capacity: 20-24 ounces
- Oil type: 4-cycle engine oil (never use 2-cycle oil)
- Change intervals: Every 25 hours of operation or at least once per season
I keep a small notebook in my shed where I record maintenance dates and hours of operation. It might seem excessive, but this simple habit has extended the life of all my power equipment.
Mastering the Art of Tilling: Techniques for Best Results
After years of trial and error, I’ve developed some techniques that get the most from a Bolens Tiller while minimizing strain:
For Breaking New Ground:
- Mow or cut existing vegetation as short as possible
- Water the area lightly 1-2 days before tilling (unless it’s already wet)
- Set the tiller to its shallowest depth for the first pass
- Make overlapping passes in a grid pattern
- Increase depth gradually with each subsequent pass
- Remove debris between passes as needed
- Make a final pass at full depth once the soil structure has been broken up
For Maintenance Tilling:
- Set depth to 2-4 inches for regular maintenance
- Till when soil is slightly damp but not wet
- Move at a steady pace, allowing the tiller to work at its own speed
- For incorporating amendments, make one pass, add materials, then make a second pass
The key to effective tilling isn’t brute force—it’s patience and proper technique. Let the machine do the work. If you find yourself pushing hard or struggling, you’re either working in soil that’s too wet, too compacted, or you haven’t broken it up gradually enough.
Tilling Depth: How Deep Should You Go?
Bolens Tillers generally offer adjustable tilling depths between 1-8 inches. But how deep should you actually till? It depends on your purpose:
- 1-3 inches: Weed control and soil aeration
- 3-5 inches: General garden maintenance and incorporating amendments
- 6-8 inches: Breaking new ground or preparing deep-rooted crops
I made the mistake of always tilling at maximum depth my first year, which brought up subsoil and actually damaged my garden’s fertility. Now I reserve deep tilling for specific purposes and use shallower depths for routine maintenance.
Tackling Tough Soils: Can a Bolens Handle Clay and Rocks?
If you’ve ever tried to garden in heavy clay or rocky soil, you know the frustration. Can a Bolens Tiller handle these challenging conditions? Based on my experience with our clay-heavy soil:
For Clay Soil:
Bolens rear-tine tillers, particularly the larger models, handle clay soil admirably. The key is timing—tilling clay when it’s too wet creates compacted clumps, while tilling when it’s too dry is like trying to break up concrete.
I’ve found the sweet spot is when a handful of soil forms a ball when squeezed but crumbles when you press it with your finger. Adding organic matter like compost before tilling dramatically improves results in clay soil.
For Rocky Soil:
Rocks present a different challenge. While Bolens Tillers can handle small rocks, large stones can damage tines and shear pins. In extremely rocky soil, I recommend:
- Do an initial pass very slowly at shallow depth
- Remove larger rocks by hand as you go
- Gradually increase depth with subsequent passes
- Consider adding a layer of rock-free topsoil or compost before final tilling
I spent one memorable Saturday removing rocks from a new garden bed after my tiller kept stalling. That evening, I had a pile of rocks the size of a small car. The next day, tilling was smooth as butter.
Maintenance: Keeping Your Bolens Tiller in Peak Condition
Like any power equipment, Bolens Tillers require regular maintenance. Following these procedures has kept my tiller running reliably for years:
After Each Use:
- Clean debris from tines and guards
- Check for loose fasteners
- Inspect for damaged or worn parts
- Wipe down exterior surfaces
Seasonal Maintenance:
- Change engine oil
- Replace spark plug
- Clean or replace air filter
- Grease all fittings and moving parts
- Check and adjust belt tension
- Inspect and sharpen tines if necessary
Annual Maintenance:
- Drain fuel system or add stabilizer if storing
- Remove and clean carburetor
- Check valve clearance
- Inspect and adjust clutch system
- Replace any worn tines or shear pins
The most common mistake I see people make is neglecting air filters. In dusty tilling conditions, air filters get dirty quickly, reducing engine performance and potentially causing damage. I check mine after every few hours of operation.
Replacing Tines: When and How
Tines eventually wear down or become damaged, especially in rocky soil. Here’s how to know when it’s time for replacement:
- Tines are bent or broken
- Tips have worn down, becoming rounded rather than pointed
- Tilling performance has noticeably decreased
- Excessive vibration during operation
Replacing tines on most Bolens models is straightforward:
- Disconnect the spark plug wire for safety
- Remove the tine shields
- Remove the pins or bolts securing the tines
- Note the orientation of the old tines before removal
- Install new tines in the same configuration
- Replace fasteners and shields
I learned the importance of noting tine orientation the hard way—installing them backward results in a tiller that barely scratches the surface instead of digging in properly.
Winter Storage: Preparing Your Bolens for the Off-Season
Proper winter storage prevents starting problems and extends the life of your tiller. Follow these steps:
- Run the engine until the fuel tank is empty, or add fuel stabilizer to a full tank
- Change the oil while the engine is warm
- Remove the spark plug and add a small amount of oil to the cylinder
- Pull the starter cord slowly to distribute oil
- Replace the spark plug
- Clean the entire tiller thoroughly
- Lubricate all moving parts
- Store in a dry, protected area
- Cover with a breathable cover (not plastic, which can trap moisture)
I keep a checklist taped to my shed wall for winterizing all my power equipment. It takes about an hour to properly prepare a tiller for storage, but it saves hours of frustration and repair costs come spring.
Troubleshooting: When Your Bolens Won’t Cooperate
Even with proper maintenance, issues can arise. Here are solutions to common problems:
Tiller Won’t Start:
- Check fuel level and freshness (old fuel is a common culprit)
- Verify spark plug is clean and properly gapped
- Ensure air filter is clean
- Confirm choke is in the proper position
- Check that kill switch is in “run” position
Engine Runs Roughly:
- Clean carburetor
- Replace fuel with fresh gasoline
- Check for loose connections
- Inspect air filter and clean or replace
- Adjust idle speed if necessary
Tines Don’t Turn:
- Check for debris wrapped around tine shaft
- Inspect drive belt for wear or damage
- Verify clutch engagement
- Check for broken shear pins
- Ensure transmission has proper oil level
Excessive Vibration:
- Look for bent or damaged tines
- Check for loose bolts throughout the machine
- Inspect engine mounts for damage
- Verify tines are properly balanced and installed
The most frustrating issue I’ve encountered was a tiller that would run for five minutes and then die. After checking everything else, I finally discovered that the gas cap vent was clogged, creating a vacuum in the tank that starved the engine of fuel. Sometimes the simplest things can cause the biggest headaches!
Cost Considerations: Is a Bolens Tiller Worth the Investment?
Bolens Tillers range in price from around $300 for entry-level front-tine models to over $1,000 for professional-grade rear-tine versions. Is the investment worthwhile?
Based on my experience, a quality tiller pays for itself in time saved, improved garden productivity, and reduced physical strain. Consider these factors:
- Renting a comparable tiller typically costs $50-80 per day
- Professional garden preparation services charge $200+ for an average garden
- The physical toll of manual digging is substantial
- A well-maintained tiller can last 10-15 years or more
For occasional gardeners with small plots, renting might make more sense. But for anyone with more than a few hundred square feet of garden space, owning a Bolens Tiller is a sound investment.
Where to Buy: Finding the Right Bolens for Your Needs
Bolens Tillers are available through various retailers:
- Home improvement stores (Home Depot, Lowe’s)
- Agricultural supply stores
- Outdoor power equipment dealers
- Online retailers
In my experience, buying from a local dealer offers significant advantages:
- Hands-on inspection before purchase
- Assembly and initial setup assistance
- Local warranty service and parts availability
- Expert advice on model selection
I purchased my current Bolens from a family-owned equipment dealer who took the time to understand my garden needs and recommended the perfect model. The relationship has proven invaluable whenever I’ve needed advice or service.
Warranty Coverage: What to Expect
Bolens typically offers a 2-year limited warranty on their tillers, covering defects in materials and workmanship. Some key points to understand:
- Warranty is typically transferable to new owners
- Commercial use may reduce warranty period
- Certain components (like belts and tines) may have shorter coverage
- Proper maintenance is required to maintain warranty coverage
I recommend keeping all purchase documentation and maintenance records. When I had an issue with my tiller’s transmission during the warranty period, having detailed records of oil changes and service made the warranty claim process much smoother.
How Bolens Stacks Up: Comparing to Other Brands
After using various tiller brands over the years, I’ve developed some perspectives on how Bolens compares:
Versus Troy-Bilt:
Troy-Bilt offers excellent quality but typically at a higher price point. Their Super Bronco and Horse models are legendary for durability but cost 15-20% more than comparable Bolens models.
Versus Craftsman:
Craftsman tillers are often similar to Bolens in construction and price. In my experience, Bolens offers slightly better durability while Craftsman may have more widespread parts availability.
Versus Husqvarna:
Husqvarna tillers tend to be premium-priced with excellent build quality. They’re worth considering if you need commercial-grade durability, but Bolens offers better value for typical home gardeners.
Versus Budget Brands:
I’ve tried various budget tillers under $250, and the difference in performance and durability compared to Bolens is substantial. The saying “buy once, cry once” definitely applies to tillers.
Real User Experiences: What Bolens Owners Say
I’ve spoken with dozens of fellow Bolens owners over the years, and certain themes consistently emerge:
Positive Feedback:
- Reliable starting, even after winter storage
- Excellent performance in tough soil conditions
- Good balance of power and maneuverability
- Durability of tines compared to cheaper brands
- Reasonable parts availability
Common Criticisms:
- Vibration can be fatiguing during extended use
- Some plastic components feel less durable than metal alternatives
- Depth adjustment mechanism can be finicky on some models
- Noise levels are high (though this is true of most tillers)
My garden club recently surveyed members about their tiller experiences, and Bolens received high marks for reliability and value, though Troy-Bilt edged it out slightly on overall satisfaction.
Making the Final Decision: Is a Bolens Tiller Right for You?
After everything I’ve shared, you might still be wondering if a Bolens Tiller is the right choice for your specific situation. Here’s my advice for different scenarios:
For Small Gardens (Under 500 sq ft):
A compact Bolens front-tine tiller with 140cc engine provides sufficient power while being easy to store and maneuver in tight spaces.
For Medium Gardens (500-2000 sq ft):
Consider a mid-sized Bolens with adjustable tilling width. The versatility will serve you well as your garden evolves.
For Large Gardens (Over 2000 sq ft):
A rear-tine Bolens with at least 190cc engine will save tremendous time and effort. The investment is justified by the scale of your garden.
For Breaking New Ground:
Prioritize a counter-rotating rear-tine model, which provides maximum digging power for virgin soil.
For Established Gardens:
A standard-rotating model offers excellent performance for maintenance tilling at a lower price point.
Conclusion: Tilling Toward a Better Garden
After fifteen years of working with various tillers, I’ve developed a deep appreciation for what a quality machine like a Bolens can do for your garden and your gardening experience. The right tiller doesn’t just prepare soil—it transforms the entire gardening process from a back-breaking chore into a manageable, even enjoyable, activity.
Whether you’re breaking new ground for your first garden or maintaining established beds, investing in a quality Bolens Tiller is one of the wisest decisions you can make as a serious gardener. The combination of power, reliability, and value has made Bolens a staple in my garden shed and in countless others across the country.
Remember that the best tiller is the one that matches your specific needs and circumstances. Take the time to assess your garden size, soil conditions, and physical capabilities before making your selection. And once you’ve chosen your Bolens companion, maintain it properly—it will reward you with years of faithful service and gardens that make the neighbors green with envy.
Happy tilling, and may your gardens always be fruitful!
