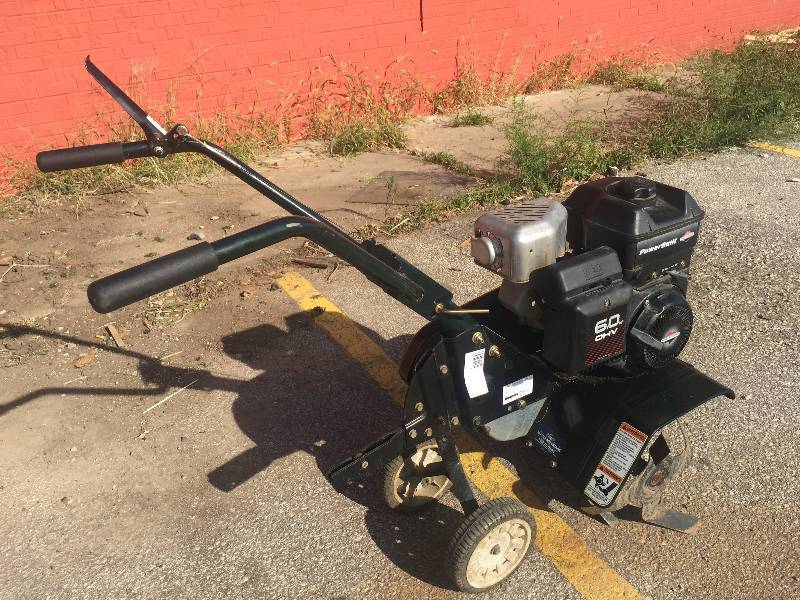
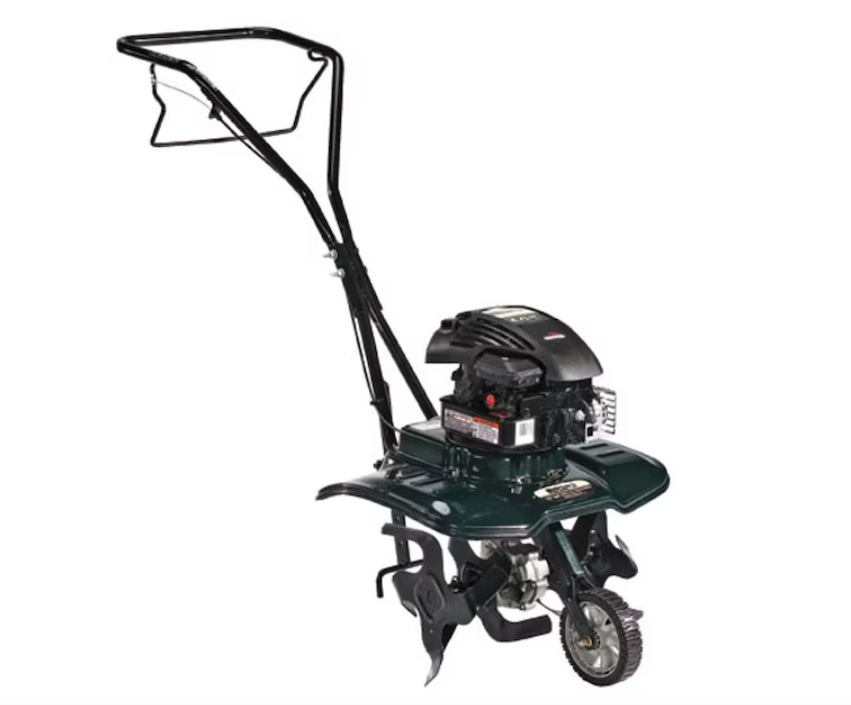
Bolens BL250 158-cc 24-in Front-Tine Forward-rotating Tiller
- Great for preparing areas of your lawn for seeding or re-seeding
- Adjustable tilling widths between 13″ and 24″ give you the versatility to fit between rows or cover wider areas
- Forward rotating tines are ideal for established gardens
- Steel tines turn soil easily to mix in compost or fertilizer
- Handle height is easily adjusted by loosening the knobs and repositioning the carriage bolt
- Pre-lubricated and factory-sealed aluminum gear transmission is maintenance free
$299.00
When I first stared at the compacted clay soil of my newly purchased home’s backyard, I felt a mix of excitement and dread. The previous owners had neglected the space for years, and what should have been fertile ground looked more like a sun-baked desert. Little did I know that my journey to transform this barren patch would lead me to discover what I now consider the most valuable tool in any serious gardener’s arsenal: the Bolens Front Tine Tiller.
It’s been three years since I made that purchase, and I want to share everything I’ve learned about selecting, operating, maintaining, and maximizing this incredible machine. Whether you’re a first-time buyer or looking to upgrade your current model, this comprehensive guide will walk you through everything you need to know about the Bolens Front Tine Tiller.
The Moment I Knew I Needed a Tiller
Let me paint you a picture: It was mid-March, the perfect time to start preparing soil for spring planting in my zone. Armed with only a spade and boundless optimism, I set out to turn over a modest 10′ x 10′ patch for my first vegetable garden.
Three hours later, I had managed to disturb approximately 3 square feet of soil, developed two blisters, and seriously questioned my life choices. The ground was so compacted that each shovelful required the force of my entire body weight. My back ached, my hands throbbed, and my dreams of a bountiful garden seemed to be slipping away.
That evening, nursing my wounds with a glass of wine and an ice pack, I began researching solutions. That’s when I discovered the world of tillers, and more specifically, the Bolens Front Tine Tiller. The reviews seemed promising, the price point reasonable, and by the next weekend, I had one delivered to my doorstep.
Understanding the Bolens Front Tine Tiller: Specifications That Matter
Before diving into operation and maintenance, let’s get familiar with what makes this machine tick. The Bolens Front Tine Tiller is designed with home gardeners in mind, striking a balance between power and maneuverability that larger rear-tine models often lack.
Engine Power and Performance
The heart of any tiller is its engine, and the Bolens doesn’t disappoint. Typically equipped with a 140-160cc 4-cycle engine (depending on the exact model), it delivers impressive power for its size class. This translates to approximately 5-6 horsepower – more than enough to tackle most residential gardening projects.
What I’ve come to appreciate is how this power-to-weight ratio gives the Bolens an advantage in smaller spaces. Unlike industrial tillers that can be unwieldy in tight corners, the Bolens maintains enough muscle to break through difficult soil while remaining nimble enough to navigate between established plants or along garden edges.
Weight and Maneuverability
At approximately 80-95 pounds (again, varying slightly by model), the Bolens Front Tine Tiller strikes an ideal balance. It’s heavy enough to maintain downward pressure on the tines (essential for breaking through tough soil) yet light enough that I can maneuver it without excessive strain.
The front-tine design means the tines are positioned in front of the wheels, pulling the machine forward during operation. For a novice like I was, this self-propelling feature was a godsend, helping me maintain control while still doing the heavy work of soil breaking.
Tilling Width and Depth
One of the most practical considerations when choosing a tiller is its tilling width. The Bolens typically offers a tilling width of 24 inches, which I’ve found to be ideal for residential gardening. Wide enough to make quick work of garden beds but narrow enough to fit between rows when needed.
As for depth adjustment, the Bolens allows for tilling depths between 5-7 inches, adjustable via a simple depth stake system. This versatility has proven invaluable as I’ve expanded from growing shallow-rooted lettuces to deeper-rooted plants like carrots and potatoes.
The Unboxing and Assembly Experience
I still remember the excitement (and slight trepidation) when the large box arrived. Having limited mechanical experience, I worried the assembly would be beyond my capabilities. Thankfully, I couldn’t have been more wrong.
Step-by-Step Assembly Guide
The Bolens comes partially assembled, with the major components requiring attachment:
- The handle assembly needs to be secured to the main body using the provided bolts and nuts.
- The depth stake must be installed at the rear of the machine.
- The wheels need to be mounted on their axles.
- The tine shield requires attachment for safety.
The included manual provides clear illustrations, and I found the entire process took less than 45 minutes, requiring only basic tools (wrenches and screwdrivers) that came with the tiller. The most challenging part was simply maneuvering the main body due to its weight.
First Impressions After Assembly
Once assembled, I was struck by how sturdy the machine felt. The steel construction of the frame and tines inspired confidence, and the control levers operated smoothly. The only minor disappointment was the plastic fuel tank, though I’ve since learned this is standard for tillers in this class and helps reduce overall weight.
Getting Started: Fuel, Oil, and First Start-Up
With assembly complete, I was eager to fire up my new garden companion. But first, there were a few essential preparation steps.
Fuel Requirements
The Bolens Front Tine Tiller operates on regular unleaded gasoline with an octane rating of 87 or higher. Unlike some older or smaller garden tools, this is a 4-cycle engine, meaning you do not mix oil with the fuel. This was a relief to me, as I’ve always found the precise mixing ratios of 2-cycle engines to be fiddly and error-prone.
I’ve found it best to use fresh fuel rather than gasoline that’s been sitting in a can for months. Stale gas is a common culprit behind starting problems, something I learned the hard way after my first winter of storage.
Oil Type and Checking Levels
Before first use, you’ll need to add engine oil. The Bolens requires SAE 10W-30 oil for most temperature conditions, though you might opt for SAE 30 in consistently warmer climates. The oil capacity is typically around 20 ounces (0.6 liters).
To check the oil level (something I do before each use now):
- Ensure the tiller is on level ground.
- Remove the oil fill cap/dipstick.
- Wipe the dipstick clean, reinsert it without screwing it in, then remove to check the level.
- Add oil if needed to bring the level to the “FULL” mark.
Starting Procedure
Starting the Bolens follows a straightforward sequence:
- Check oil and fuel levels.
- Move the throttle control to the “START” position.
- For cold starts, engage the choke (push the lever to the “CHOKE” position).
- Turn the engine switch to “ON.”
- Pull the starter cord with a smooth, continuous motion.
- Once the engine starts, gradually move the choke to “RUN” as the engine warms up.
- Set the throttle to your desired operating speed.
I remember the satisfaction of hearing the engine roar to life on my second pull – a much better result than my previous experiences with finicky lawnmowers and string trimmers!
Taking It to the Soil: My First Tilling Experience
With the machine humming confidently, I guided it to my intended garden plot. This is where my tilling education truly began.
Handling Techniques for Different Soil Types
My property’s clay-heavy soil presented a significant challenge for my first tilling session. Here’s what I learned:
For hard, compacted soil (like mine was):
- Make your first pass at a shallow depth setting
- Till in a crisscross pattern (once lengthwise, then across)
- Increase depth incrementally with each pass
- Be patient – rushing will only strain the machine
For loamy or previously worked soil:
- You can typically start with a deeper setting
- One or two passes may be sufficient
- The tiller will move more quickly through the soil
For sandy soil:
- Use a medium depth setting to prevent the tiller from digging too aggressively
- Focus on maintaining even depth throughout
Adjusting Tilling Depth
The depth stake at the rear of the machine controls how deeply the tines penetrate the soil. I learned to start shallow and increase gradually, especially in virgin soil. The adjustment is simple – pull the stake upward, move it to the desired notch, and secure it in place.
Over time, I’ve developed a three-pass approach for new beds:
- First pass: Shallowest setting to break the surface
- Second pass: Medium depth to further break clods
- Final pass: Full depth to achieve that fluffy, plantable consistency
Maneuvering Challenges and Solutions
The self-propelling action of the front tines means the Bolens naturally wants to move forward during operation. This took some getting used to, as my instinct was to fight against this motion. I quickly learned that gentle guidance rather than forceful control yields the best results.
For turning at the end of rows, I found it easiest to:
- Lift slightly on the handles to raise the tines
- Make the turn while the tines are elevated
- Lower the tines back into the soil to continue
This technique prevents unnecessary soil disruption and makes for cleaner bed edges.
Maintenance: Keeping Your Tiller in Prime Condition
As my first gardening season progressed, I came to appreciate that proper maintenance isn’t just about extending the life of the machine – it directly impacts performance. A well-maintained tiller simply works better.
Regular Cleaning Procedures
After each use, I’ve made it a habit to:
- Brush soil from the tines while it’s still loose and damp
- Use a garden hose to rinse remaining soil from the tines and shield
- Wipe down the engine and controls with a damp cloth
- Check for any plant material wrapped around the tine shaft and remove it
For stubborn clay soil that dries like concrete, I keep an old putty knife handy to scrape it off before it hardens completely.
Seasonal Maintenance Schedule
Beyond post-use cleaning, I follow a seasonal maintenance routine:
Spring (Pre-Season)
- Change the engine oil
- Replace the spark plug
- Check and clean the air filter
- Inspect the tines for damage or excessive wear
- Check all bolts and fasteners for tightness
- Lubricate control cables and moving parts
Mid-Season (If Used Heavily)
- Check oil level and top up if needed
- Clean air filter
- Inspect tines and belts
Fall (Pre-Storage)
- Thoroughly clean the entire machine
- Change oil
- Remove fuel or add stabilizer
- Lubricate tines to prevent rust
- Check and tighten all fasteners
Tine Maintenance and Replacement
The tines are quite literally where the rubber meets the road – or in this case, where steel meets soil. After three seasons, I’ve needed to replace one set of tines due to wear and soil conditions.
To replace tines:
- Remove the tine shield for better access
- Remove the cotter pins that secure the tines to the shaft
- Slide the old tines off the shaft
- Install new tines in the same orientation
- Secure with new cotter pins
- Reinstall the tine shield
I recommend photographing the tine arrangement before removal – their specific orientation matters for proper tilling action.
Belt Maintenance and Replacement
The drive belt transfers power from the engine to the tines, making it a critical component. Signs of a worn belt include:
- Slipping during operation
- Visible cracking or fraying
- Decreased tilling performance
- Burning smell during use
Replacing the belt requires:
- Removing the belt cover
- Loosening the idler pulley to create slack
- Removing the old belt
- Installing the new belt according to the routing diagram in the manual
- Retensioning the idler pulley
- Reinstalling the belt cover
This is one of the more technical maintenance tasks, but still manageable for a moderately handy person with basic tools.
Troubleshooting Common Issues
Even with diligent maintenance, occasional issues can arise. Here are the most common problems I’ve encountered and their solutions:
Engine Won’t Start
When faced with a tiller that refuses to start:
- Check fuel level and freshness (stale fuel is a common culprit)
- Verify the spark plug is clean and properly gapped
- Ensure the air filter isn’t clogged
- Confirm the fuel shut-off valve is open
- Check that the choke is in the proper position for the engine temperature
My most embarrassing non-start incident involved a clogged air filter after a particularly dusty tilling session. A simple cleaning had it running again in minutes.
Tines Not Rotating Properly
If the engine runs but the tines don’t rotate effectively:
- Check for debris wrapped around the tine shaft
- Inspect the drive belt for wear or improper tension
- Verify the transmission is engaging correctly
- Ensure the throttle is set high enough for proper operation
Excessive Vibration
Abnormal vibration usually indicates:
- Damaged or bent tines
- Loose mounting bolts
- Engine running rough due to fuel or carburetor issues
The first time I experienced unusual vibration, I discovered a rock had become wedged between two tines – a simple fix once identified.
Safety First: Operating Your Tiller Without Incident
Power equipment demands respect, and tillers are no exception. After a minor incident involving my favorite gardening shoes (now retired), I developed a strict safety protocol:
Essential Safety Gear
When operating my Bolens, I always wear:
- Closed-toe, sturdy shoes or boots
- Long pants (never shorts)
- Safety glasses to protect from debris
- Hearing protection during extended use
- Gloves to improve grip and prevent blisters
Operating Precautions
Beyond proper attire, safe operation includes:
- Clearing the area of rocks, sticks, and other debris before tilling
- Knowing the location of underground utilities, irrigation lines, etc.
- Never operating on excessively steep slopes
- Keeping children and pets away from the working area
- Avoiding loose clothing that could become entangled
- Never removing guards or safety shields
- Shutting off the engine before unclogging tines or performing adjustments
Children and Pet Safety
With young nieces and nephews who visit frequently, I’ve established clear boundaries around power equipment:
- The tiller is stored in a locked shed
- Children are taught to maintain a safe distance when equipment is in use
- I never leave the tiller unattended with the engine running
- After use, I wait for all moving parts to stop completely before stepping away
Seasonal Storage: Protecting Your Investment
Proper off-season storage has proven crucial for ensuring my tiller starts easily when spring arrives.
Preparing for Winter Storage
My end-of-season routine includes:
- Running the engine until the fuel tank is empty, or adding fuel stabilizer to a full tank
- Changing the oil while the engine is still warm
- Removing the spark plug and adding a small amount of oil to the cylinder
- Pulling the starter cord slowly to distribute oil, then reinstalling the spark plug
- Cleaning all soil from the tines and applying a light coat of oil to prevent rust
- Storing in a dry, protected location on a level surface
Storage Location Considerations
The ideal storage location should be:
- Dry and protected from the elements
- Away from fertilizers and pool chemicals that can cause corrosion
- Temperature-stable if possible
- Secure from unauthorized access
- Well-ventilated if any fuel remains in the tank
I store mine on a small wooden platform in my garden shed, covered with a breathable canvas tarp that prevents dust accumulation without trapping moisture.
Beyond Basic Tilling: Versatile Applications
As I’ve grown more comfortable with my Bolens, I’ve discovered it’s useful for more than just breaking new ground.
Incorporating Amendments
The tiller excels at mixing in:
- Compost and organic matter
- Granular fertilizers
- Lime or sulfur for pH adjustment
- Cover crops as green manure
I typically spread amendments evenly over the soil surface, then till to a depth of 4-6 inches to incorporate them thoroughly.
Creating Specialized Garden Beds
The Bolens has helped me create:
- Raised beds by tilling the base before adding frames and additional soil
- Double-dug beds for deep-rooted vegetables
- Wide pathways between planting areas
- Decorative borders along driveways and walkways
Lawn Renovation
When portions of my lawn needed renovation, the tiller proved invaluable for:
- Breaking up compacted soil before reseeding
- Incorporating topsoil into existing lawn areas
- Preparing soil for sod installation
- Creating smooth, level surfaces for patios and walkways
Finding Replacement Parts and Service
All machines eventually need parts or service. Here’s what I’ve learned about maintaining my Bolens long-term:
Sourcing Genuine Parts
I’ve found reliable sources for Bolens parts through:
- Local authorized dealers (best for technical advice)
- Online retailer specialized in outdoor power equipment
- The manufacturer’s website
- Third-party sellers with compatibility charts
Common replacement parts I keep on hand include:
- Air filters
- Spark plugs
- Drive belts
- Tine retaining pins
DIY vs. Professional Service
While I handle most maintenance myself, I’ve learned to recognize when professional help is warranted:
- Engine running issues that basic troubleshooting doesn’t resolve
- Transmission problems
- Major mechanical failures
- Annual tune-ups if you’re not mechanically inclined
Most authorized service centers can handle Bolens tillers, though wait times during peak season can be substantial – another reason I prioritize preventative maintenance.
Cost Considerations: Value Over Time
Initially, I questioned whether the Bolens’ price tag (typically $300-500 depending on model and promotions) represented good value. Three years later, I can confidently say it’s been one of my best garden investments.
Cost vs. Alternatives
When I consider alternatives:
- Hand-tilling would have required countless hours of backbreaking labor
- Hiring a service for initial ground breaking would have cost $150-300 for a single job
- Renting a tiller multiple times per season adds up quickly ($50-75 per day)
The Bolens paid for itself during my first major garden expansion, and continues to provide value with each use.
Longevity Expectations
With proper maintenance, most quality front-tine tillers like the Bolens can last 10-15 years or more. The engine typically outlasts the wearing components (tines, belts, cables), which are all replaceable.
Mine is showing some cosmetic wear after three years of regular use, but mechanically performs as well as the day I bought it – a testament to both the build quality and the benefits of regular maintenance.
Warranty Considerations
The Bolens typically comes with a 2-year limited warranty for residential use. This covers:
- Manufacturing defects
- Material failures
- Engine issues (sometimes under a separate engine manufacturer warranty)
The warranty explicitly excludes:
- Normal wear items (tines, belts, filters)
- Damage from improper use
- Lack of maintenance
- Commercial applications
I recommend registering your purchase immediately and keeping all maintenance records, as warranty claims often require proof of proper care.
Is the Bolens Front Tine Tiller Right for You?
After three years with my Bolens, I can offer some guidance on whether it might be the right choice for your situation.
Ideal Applications
The Bolens Front Tine Tiller excels for:
- Medium-sized gardens (up to 2,500 square feet)
- Breaking new ground in moderately challenging soil
- Maintenance tilling of established gardens
- Incorporating amendments
- Homeowners with average physical strength
Less Suitable Scenarios
You might consider alternatives if:
- You have extremely rocky or root-filled soil (a rear-tine tiller might be better)
- Your garden is very small (under 100 square feet)
- You need to till extremely large areas (acres rather than square feet)
- You have serious physical limitations that make guiding the tiller difficult
The Transformation: Before and After
Looking out at my backyard now, it’s hard to believe it’s the same property I purchased three years ago. What was once compacted clay is now a thriving ecosystem of vegetables, flowers, and herbs, with rich, friable soil that supports earthworms and beneficial microorganisms.
The transformation wasn’t immediate or magical – it required sweat equity, compost, mulch, and yes, regular tilling at appropriate times. But the Bolens Front Tine Tiller made possible what would have otherwise remained just a dream.
Where I once saw an intimidating expanse of hostile ground, I now see possibility. Each spring, when I pull the tiller from its winter rest and it roars to life on the first or second pull, I feel a sense of partnership with this machine. Together, we’ve created something beautiful and productive.
Final Thoughts: The Journey Continues
Gardening is never truly finished – it’s a continuous cycle of growth, harvest, and renewal. As I plan next season’s expansion (a small orchard of dwarf fruit trees), I know my Bolens will be there to help prepare the soil.
For anyone standing at the beginning of their gardening journey, looking at difficult soil with determination and maybe a touch of anxiety, I offer this encouragement: The right tools make all the difference, and a quality tiller like the Bolens can transform both your landscape and your relationship with it.
The soil beneath our feet holds incredible potential. Sometimes it just needs a little help to reveal its gifts – and for me, the Bolens Front Tine Tiller has been the perfect partner in unlocking that potential, one turn of the tines at a time.
