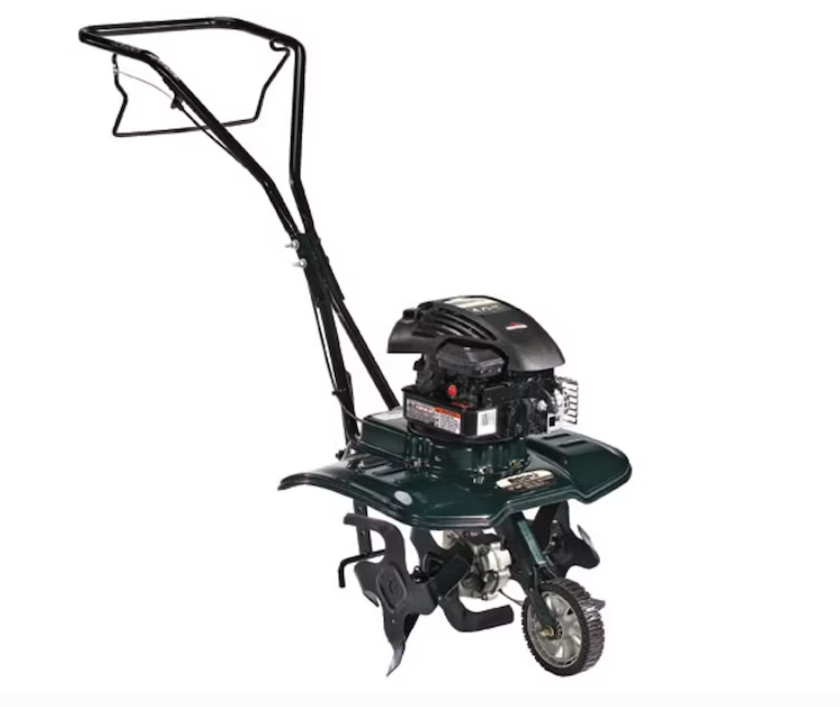
Bolens BL250 158-cc 24-in Front-Tine Forward-rotating Tiller
- Great for preparing areas of your lawn for seeding or re-seeding
- Adjustable tilling widths between 13″ and 24″ give you the versatility to fit between rows or cover wider areas
- Forward rotating tines are ideal for established gardens
$449.00
When I first laid eyes on the patch of land behind my new home, I saw nothing but potential. Beneath the overgrown weeds and compacted soil lay the promise of a bountiful garden – if only I had the right tools to bring it to life. After weeks of research and countless conversations with fellow gardening enthusiasts, I made what I now consider one of the best investments for my gardening journey: a Bolens Rototiller. This workhorse has transformed not just my garden, but my entire approach to cultivation. Let me take you through my experience and everything I’ve learned about this remarkable machine.
The Moment I Knew I Needed a Serious Tiller
I still remember that spring morning when I stood in my backyard, shovel in hand, attempting to turn over the soil for my first vegetable garden. After an hour of backbreaking work and minimal progress, I leaned on my shovel, wiped sweat from my brow, and admitted to myself what experienced gardeners already knew: proper soil preparation requires the right equipment if you want to save your back and achieve professional results.
That weekend, I visited my neighbor Tom, whose garden I’d always admired. As we walked between his perfectly prepared beds, I asked about his secret. He simply smiled and led me to his shed where a Bolens Rototiller sat. “This machine,” he said, patting it affectionately, “has paid for itself ten times over.”
Understanding the Bolens Rototiller: Features That Make a Difference
Before diving into my purchasing journey, let me walk you through what makes the Bolens Rototiller stand out in a crowded market of garden tools.
Design and Build Quality
The first thing that struck me about the Bolens was its solid construction. Unlike some lighter models that seem to bounce across the soil surface, the Bolens has a substantial weight that helps it dig deep. The frame is constructed from heavy-duty steel that’s built to last through seasons of hard work.
I’ve now owned mine for three seasons, and despite putting it through some seriously challenging soil conditions (including a section of my yard that I’m convinced was once a gravel driveway), the frame shows minimal wear. The handles are ergonomically designed with comfortable grips that reduce vibration – something you’ll appreciate after an hour of tilling.
Engine Power and Performance
Bolens rototillers typically come equipped with engines ranging from 136cc to 208cc, depending on the model you select. My mid-range model features a 179cc engine that strikes an excellent balance between power and fuel efficiency.
What impressed me most during my first use was how the engine maintained consistent power even when encountering tough soil and roots. The four-stroke engine delivers impressive torque, allowing the tines to chew through compacted soil without bogging down. It’s this consistent performance that makes the Bolens stand out from less expensive alternatives I’d tried previously.
Tilling Capacity
The tilling width on Bolens models ranges from 16 inches to 26 inches. I opted for the 20-inch model, which has proven perfect for my medium-sized garden. It’s wide enough to make quick work of larger areas but still maneuverable enough for working between established beds.
As for depth, my model can till up to 8 inches deep, which is ideal for establishing new beds. The depth is adjustable via a simple lever system, allowing me to switch between deep tilling for new areas and shallower cultivation for maintenance.
Maneuverability and Ease of Use
Despite its substantial weight (approximately 130-150 pounds depending on the model), the Bolens features design elements that make it surprisingly manageable. The self-propelled drive system does much of the work, while the counter-rotating tines actually help pull the machine forward rather than fighting against your direction.
For a first-time tiller user like I was, this made a world of difference. Instead of wrestling with the machine, I found myself guiding it with modest pressure, almost like walking a well-trained but powerful dog.
The Investment: Understanding Bolens Rototiller Pricing
Let’s talk about the elephant in the garden – cost. Quality equipment is an investment, and the Bolens is no exception. Here’s my breakdown of what you can expect to spend:
Price Ranges by Model
Entry-level Bolens rototillers start around $499 for the smaller models with 136cc engines and 16-inch tilling widths. These are suitable for small gardens and light-duty work.
Mid-range models, like my 20-inch with the 179cc engine, typically run between $649-$799. These hit the sweet spot for most home gardeners with medium to large gardens.
Professional-grade models with 208cc engines and 24-26 inch tilling widths can range from $899-$1,200 depending on features and attachments included.
Value Perspective
Initially, I experienced significant sticker shock. Coming from a background of using hand tools, spending over $700 on a single garden implement seemed extravagant. However, after three seasons of use, I can confidently say the value equation makes sense for several reasons:
- Time savings: What once took me an entire weekend of exhausting labor now takes under two hours.
- Improved results: The quality of soil preparation is superior to anything I could achieve manually.
- Expanded capabilities: I’ve been able to convert more lawn to garden space than I would have attempted with hand tools.
- Durability: With proper maintenance, this machine should last 10-15 years or more.
When amortized over its expected lifespan, the annual cost becomes quite reasonable – especially when I consider the physical toll saved on my body and the improved garden yields resulting from better soil preparation.
Where to Purchase Your Bolens Rototiller
Finding the right place to purchase your Bolens can impact both price and after-sale support. Here’s where I looked and what I learned:
Authorized Dealers
I ultimately purchased my Bolens from an authorized dealer about 30 miles from my home. While I could have found it slightly cheaper online, the benefits of buying from a dealer included:
- In-person demonstration before purchase
- Assembly and initial setup included
- Local warranty service
- Relationship with technicians who could provide maintenance tips
Most urban and suburban areas have at least one authorized Bolens dealer within reasonable driving distance. These are often independent power equipment stores rather than big box retailers.
Large Home Improvement Stores
Chains like Home Depot, Lowe’s, and Menards sometimes carry Bolens equipment, though selection may be limited to the most popular models. The advantage here is potential sale pricing and convenient locations, but staff knowledge about the specifics of the equipment varies widely.
Online Retailers
Amazon, Northern Tool, and other online retailers offer Bolens rototillers, often with free shipping. While this can be the most price-competitive option, remember that these are heavy machines that typically arrive requiring some assembly. Unless you’re comfortable with mechanical assembly, this might not be the best choice.
The Assembly Process: Getting Started Right
If you purchase from a dealer as I did, assembly might be included or available for a nominal fee. However, if you’re handling assembly yourself, here’s what to expect:
What Comes in the Box
My Bolens arrived with:
- The main tiller body with engine mounted
- Handle assembly (unattached)
- Tine shields
- Depth stake
- Wheels
- Hardware package (bolts, nuts, washers)
- Engine oil (typically not pre-filled)
- Owner’s manual and warranty information
Assembly Steps
The assembly process took me about 90 minutes, working methodically with basic tools. The key steps included:
- Attaching the handle assembly to the main body
- Mounting the wheels to the axle
- Installing the tine shields
- Attaching the depth stake
- Adding engine oil (very important – engines typically ship dry)
- Checking all connections and fasteners for tightness
The manual provided clear illustrations for each step, though I found a couple of YouTube videos specific to my model that helped visualize the process better than the printed instructions.
Starting and Operating Your Bolens Rototiller
The first time I prepared to start my Bolens, I felt a mixture of excitement and trepidation. Would this powerful machine be difficult to control? Would I struggle to get it started? Here’s what I learned:
Starting Procedure
Starting a Bolens rototiller follows a straightforward procedure:
- Check oil level (this should become habit before each use)
- Fill with fresh fuel (more on fuel requirements shortly)
- Move the throttle to the “start” position
- Set choke to closed position (if engine is cold)
- Turn the engine switch to “on”
- Pull the starter cord with a smooth, firm motion
Most models start within 1-3 pulls when new, though cold weather may require additional attempts. Once running, allow the engine to warm up for 1-2 minutes before engaging the tines.
Operation Basics
Operating the tiller effectively requires understanding a few key controls:
- Throttle control: Located on the handle, this adjusts engine speed and power
- Clutch lever: Engages the tines (never engage on pavement or hard surfaces)
- Depth stake: Adjusts how deeply the tines dig
- Drag stake: Helps control forward speed and tilling depth
For first-time users, I recommend starting with the depth stake set for shallow tilling, even if your goal is deep soil preparation. This allows you to get a feel for the machine’s power and handling characteristics before tackling more challenging work.
The most important lesson I learned was to let the machine do the work. Fighting against it or trying to force it faster than its natural pace only results in operator fatigue and poorer results.
Soil Types and Tilling Performance
One of the most impressive aspects of the Bolens is its versatility across different soil conditions. Here’s how it performs with various soil types I’ve encountered:
Clay Soil
My property features sections of heavy clay soil that used to leave me exhausted after minimal progress with hand tools. The Bolens handles clay impressively, though with some techniques specific to this challenging medium:
- Make multiple passes, increasing depth gradually
- Till when soil moisture is moderate (not too wet or dry)
- Consider adding organic amendments between passes
With this approach, even my heaviest clay sections have been transformed into workable garden beds.
Sandy Soil
For friends with sandy soil who have borrowed my tiller, the experience is quite different. The Bolens moves through sandy soil with ease, sometimes requiring the depth stake to be set deeper to prevent the machine from moving too quickly. The counter-rotating tines excel at incorporating organic matter into sandy soil, helping improve its structure and water retention.
Rocky Soil
This is where the Bolens truly demonstrates its build quality. When I tackled a section of my property that contained numerous small rocks, I was concerned about damage to the tines. However, the hardened steel tines handled the rocks admirably, either displacing them to the surface for removal or working around larger obstacles.
For extremely rocky areas, I do recommend picking out the largest rocks before tilling to prevent unnecessary wear on the machine.
Compacted Soil
Breaking new ground in compacted soil is where powerful rototillers like the Bolens justify their cost. Areas of my yard that had been walkways for years required significant work to convert to garden beds. The approach that worked best was:
- Mow any existing vegetation as short as possible
- Water the area lightly 1-2 days before tilling (not soggy, just moist)
- Set the tiller to medium depth for the first pass
- Make perpendicular passes to break up clods
- Increase depth for subsequent passes
While this required patience, the results were remarkable. What had been hard-packed soil unsuitable for growing became loose, workable garden beds ready for planting.
Tilling Width and Depth: Finding Your Sweet Spot
Understanding how to leverage the adjustable tilling width and depth of your Bolens will dramatically improve your efficiency and results.
Tilling Width Options
Most Bolens models offer adjustable tilling widths. My 20-inch model can be configured to till at 20″, 17″, or 14″ widths by removing or reconfiguring the outer tines. This flexibility has proven invaluable for different garden tasks:
- Maximum width (20″) for breaking new ground or preparing large areas
- Medium width (17″) for working between established beds or rows
- Minimum width (14″) for cultivating between widely spaced plants or in tight spaces
Adjusting the width does require some basic tool work, so it’s not something you’ll want to change frequently during a single session. I typically plan my work to complete all tasks requiring a specific width before reconfiguring.
Depth Control Fundamentals
The depth stake at the rear of the machine is your primary means of controlling how deeply the tines penetrate. This adjustable bar does two things: it regulates depth and it provides drag that helps control the forward motion of the tiller.
For new users, I recommend starting with shallow settings until you’re comfortable with the machine’s power and handling characteristics. As you gain experience, you’ll develop a feel for how different depth settings work with your specific soil conditions.
For established gardens, I’ve found that a medium depth setting of 4-5 inches is ideal for seasonal bed preparation, while the maximum depth of 7-8 inches is reserved for breaking new ground or deeply incorporating amendments.
Fuel, Maintenance, and Long-Term Care
Keeping your investment running smoothly requires understanding its maintenance needs. After three seasons with my Bolens, I’ve developed a routine that keeps it running like new.
Fuel Requirements
The Bolens requires regular unleaded gasoline with an octane rating of 87 or higher. I’ve found that fuel stabilizer is essential if you plan to store the machine with fuel in the tank for more than 30 days – this prevents varnish formation that can clog the carburetor.
Some important fuel tips I’ve learned:
- Always use fresh fuel (less than 30 days old)
- Avoid ethanol-heavy fuels if possible (E10 is usually acceptable, but higher ethanol content can cause problems)
- Keep the fuel cap vent clear for proper operation
- Never fill while the engine is hot
Routine Maintenance Schedule
Following this basic maintenance schedule has kept my tiller running flawlessly:
After each use:
- Clean debris from tines and guards
- Check for loose or damaged parts
- Wipe down exterior
Every 25 hours of operation:
- Change engine oil
- Check air filter and clean if necessary
- Inspect tines for wear and tighten mounting bolts
Annually or every 100 hours:
- Replace air filter
- Replace spark plug
- Change transmission fluid (if applicable to your model)
- Lubricate all moving parts
- Check and adjust belt tension
Tine Maintenance and Replacement
The tines are the workhorses of your rototiller and will eventually show wear. Signs that tines may need replacement include:
- Reduced digging effectiveness
- Excessive bouncing during operation
- Visible wear or bending of tine ends
Replacement tines are readily available through dealers, home improvement stores, and online retailers. A complete set for my 20-inch model costs approximately $120-150, and replacement is a straightforward DIY task requiring basic hand tools.
I’ve found that coating the tines with a light spray of WD-40 after cleaning them helps prevent rust during storage and extends their service life.
Troubleshooting Common Issues
Even the best equipment occasionally has issues. Here are some common problems I’ve encountered or heard about from other Bolens owners, along with solutions:
Engine Won’t Start
If you’re pulling the starter cord and nothing happens:
- Check the engine switch is in the “on” position
- Verify there’s fresh fuel in the tank
- Ensure the spark plug wire is connected
- Check if the fuel valve is open (if equipped)
- Confirm the choke is in the proper position for engine temperature
For engines that crank but won’t start, the most common culprits are old fuel, a dirty carburetor, or a fouled spark plug.
Tines Won’t Rotate
If the engine runs but the tines don’t turn:
- Check that the clutch is fully engaged
- Inspect the drive belt for wear or slippage
- Look for debris wrapped around the tine shaft
- Verify the transmission is functioning properly
In my experience, most issues with non-rotating tines relate to the clutch cable adjustment or debris entanglement.
Excessive Vibration
Unusual vibration during operation can indicate:
- Bent or damaged tines
- Material wrapped around the tine shaft
- Engine mounting bolts have loosened
- Internal gear or bearing issues
I once experienced alarming vibration that turned out to be nothing more than twine from my garden wrapped tightly around the tine shaft – a simple fix once identified.
The Learning Curve: Is Bolens Right for Beginners?
When I purchased my Bolens, I had zero experience with power tillers. Three seasons later, I can offer perspective on the learning curve for beginners:
Initial Challenges
The first time I used my tiller, I found myself wrestling with it more than necessary. The powerful engine and aggressive tines can make the machine feel like it’s running away from you if you’re not prepared. However, after about 30 minutes of use, I began to understand how to work with the machine rather than against it.
The key insights for beginners are:
- Let the machine do the work. Fighting it leads to fatigue and poor results.
- Start with shallower depth settings until you develop a feel for the machine.
- Plan your tilling pattern to minimize turns, which are more challenging than straight runs.
- Take breaks when needed – fatigue leads to mistakes.
Safety Considerations
For new users, safety should be paramount:
- Always wear sturdy closed-toe shoes or boots
- Use eye protection to guard against flying debris
- Consider hearing protection for extended use
- Keep children and pets away from the work area
- Never attempt to clear jammed tines while the engine is running
Time to Proficiency
Based on my experience and that of friends who’ve used my machine, most gardeners become comfortable with basic operation after 2-3 hours of use. Developing true proficiency – where you can handle challenging soil conditions and maximize the machine’s capabilities – typically takes a full season of regular use.
Comparing Bolens to Competitors
Before settling on my Bolens, I researched and tested several competing brands. Here’s how Bolens compares to other options in the market:
Bolens vs. Troy-Bilt
Troy-Bilt is perhaps the most recognized name in rototillers, with a long history and reputation for quality. In my comparison:
- Troy-Bilt models typically cost 10-15% more than comparable Bolens
- Both offer similar build quality and engine options
- Troy-Bilt may have slightly better parts availability
- Bolens often includes features as standard that are optional on Troy-Bilt
For my needs and budget, the Bolens represented better value while delivering comparable performance.
Bolens vs. Husqvarna
Husqvarna’s tillers occupy a premium position in the market:
- Husqvarna models generally cost 20-30% more than Bolens
- They offer some advanced features like counterweights and power reverse
- Engine quality is comparable between brands
- Husqvarna may have a slight edge in transmission durability
For most home gardeners, the additional features of Husqvarna don’t justify the price premium over the Bolens.
Bolens vs. Budget Brands
I briefly considered less expensive options from brands like Earthquake and Champion:
- Budget models typically cost 30-40% less than Bolens
- Build quality and material thickness is noticeably inferior
- Engine power is often adequate but less refined
- Long-term durability concerns are significant
My decision to invest more in the Bolens came down to expected lifespan and the ability to handle tough conditions consistently – areas where budget brands often fall short.
Available Attachments and Versatility
One aspect of the Bolens that surprised me was the availability of attachments that extend its functionality beyond basic tilling.
Common Attachments
Depending on your model, these attachments may be available:
- Furrow attachment for creating planting rows
- Hiller/furrower for mounding soil around plants
- Edger kit for maintaining garden borders
- Dethatcher for lawn maintenance
- Snow thrower attachment (on some larger models)
I’ve added the furrow attachment to my collection, which has been invaluable for planting row crops like potatoes and corn. The attachment cost about $45 and installed in under 20 minutes.
Attachment Compatibility
Before purchasing attachments, verify compatibility with your specific model. Bolens has changed designs over the years, and not all attachments work with all models. Your owner’s manual should list compatible accessories, or you can consult with your dealer.
Enhancing Versatility
Even without purchasing additional attachments, I’ve found ways to maximize the versatility of my basic tiller:
- Using it at shallow depth settings for weeding between rows
- Setting it to minimum width for maintaining pathways
- Employing it to incorporate compost into established beds
With creative approaches, the standard tiller configuration can handle 90% of soil preparation tasks in a typical home garden.
Understanding Your Warranty Coverage
Warranty protection represents an important part of your investment in a Bolens rototiller.
Standard Warranty Terms
Most new Bolens tillers come with a 2-year limited warranty for residential use. This typically covers:
- Manufacturing defects in materials and workmanship
- Engine issues (sometimes through a separate engine manufacturer warranty)
- Transmission components
Commercial use typically reduces the warranty period to 90 days, reflecting the increased wear associated with professional applications.
Warranty Exclusions
It’s important to understand what isn’t covered:
- Normal wear items like belts, tines, and filters
- Damage from improper maintenance
- Issues caused by improper fuel or oil
- Damage from accidents or misuse
Extending Protection
Some dealers offer extended warranty programs that can provide coverage for 3-5 years. I opted for a 3-year extended plan that cost $89, which I considered reasonable insurance for a machine that represents a significant investment.
When evaluating extended warranty options, focus on:
- Who performs the repairs (dealer, local shop, or ship-to manufacturer)
- Whether maintenance items are included
- If there’s a deductible for service calls
- Whether replacement or loaner equipment is provided during repairs
Off-Season Storage: Protecting Your Investment
Proper storage during the off-season dramatically extends the life of your rototiller. After making some mistakes my first year, I’ve developed this storage routine:
End-of-Season Preparation
Before storing for winter or extended periods:
- Run the engine until the fuel tank is empty, or add fuel stabilizer to a full tank
- Change the oil while the engine is still warm
- Remove the spark plug and add a small amount of oil to the cylinder
- Clean all soil from tines and undercarriage
- Lubricate all moving parts
- Loosen belt tension if storing for more than 3 months
- Touch up any paint chips to prevent rust
Storage Location Considerations
The ideal storage location is:
- Dry and protected from weather
- Temperature-stable (extreme heat or cold can damage components)
- Protected from pests (mice love to nest in equipment and chew wires)
- Accessible enough that you’ll perform periodic checks
I store mine in my attached garage on a wooden pallet to keep it off the concrete floor, which can trap moisture against metal parts.
Periodic Maintenance During Storage
Even during storage, some attention helps prevent issues:
- Rotate the engine by hand (with spark plug removed) every 1-2 months
- Check for any pest activity or nesting
- Verify that no water has intruded into the storage area
- Inspect for any developing rust and address immediately
This minimal effort during the off-season pays dividends when spring arrives and you’re ready to garden again.
Bolens for Small Gardens: Right-Sizing Your Choice
Not all gardens require the largest, most powerful tiller. For smaller spaces, Bolens offers more compact options that might be more appropriate.
When Smaller Is Better
Consider a smaller Bolens model (16″ width, 136cc engine) if:
- Your garden is less than 1,000 square feet
- You have limited storage space
- You’re concerned about machine weight for transportation or handling
- Your budget is more constrained
These smaller models typically cost $100-200 less than their larger counterparts while maintaining the core quality features.
Small Garden Techniques
In smaller spaces, tilling technique becomes even more important:
- Plan your tilling pattern carefully to minimize turns
- Consider tilling in sections rather than all at once
- Use edge guards to protect established plants and structures
- Take advantage of the adjustable width feature for versatility
I’ve helped several friends with small urban gardens select appropriately-sized tillers, and the consensus has been that even small gardens benefit tremendously from the right mechanized help.
Real-World User Experiences: What Owners Say
Beyond my personal experience, I’ve gathered feedback from other Bolens owners through gardening forums, local gardening clubs, and conversations with fellow customers at my dealer.
Positive Feedback Themes
The most common praise focuses on:
- Durability: Many owners report 10+ years of reliable service
- Power: The ability to handle tough soil conditions consistently
- Value: Good balance of quality and price compared to premium brands
- Simplicity: Straightforward operation without unnecessary complexity
Common Criticisms
To provide balance, these are the most frequent complaints:
- Weight can be challenging for some users (particularly older gardeners)
- Parts availability sometimes lags behind more popular brands
- Some plastic components (like belt guards) may crack with age
- Limited dealer network in some regions
Long-Term Satisfaction
Perhaps most telling is that among the dozen or so Bolens owners I’ve spoken with directly, all but one expressed satisfaction with their purchase. The exception was someone who needed dealer service in a remote area and found support lacking – a valid concern if you live far from established service centers.
Making Your Final Decision
After three seasons with my Bolens rototiller, I can offer this guidance to those considering a purchase:
Who Should Invest in a Bolens
A Bolens rototiller makes the most sense for:
- Gardeners with medium to large plots (500+ square feet)
- Those tackling new garden establishment or significant soil improvements
- People planning long-term gardening commitments
- Anyone who values durability and performance over lowest initial cost
Who Might Consider Alternatives
You might want to explore other options if:
- Your garden is very small (under 300 square feet)
- You garden only occasionally or are just testing your interest
- You have physical limitations that make handling heavier equipment difficult
- You live very far from service centers or dealers
Final Purchasing Tips
If you’ve decided a Bolens is right for you:
- Try to test or at least handle the machine before purchasing if possible
- Purchase at the end of the season for potential discounts (September-October)
- Consider certified refurbished models for savings (often with warranty)
- Don’t skimp on the model size – slightly bigger is better than too small
- Budget for essential accessories like a cover and maintenance supplies
Conclusion: Transforming My Garden Journey
Looking back at that first spring day when I stood frustrated in my yard, shovel in hand, I’m amazed at the transformation not just of my garden, but of my entire approach to gardening. The Bolens rototiller has expanded what’s possible in my garden while reducing the physical toll of intensive cultivation.
What once seemed like an extravagant purchase has proven to be one of the wisest investments in my gardening journey. From breaking new ground to maintaining established beds, from incorporating amendments to preparing fall gardens for winter, this machine has become an indispensable partner in creating the productive and beautiful garden I’d always envisioned.
If you’re standing at the crossroads I once faced, questioning whether to invest in a quality tiller or continue the back-breaking work of manual cultivation, I hope my experience helps inform your decision. For those with the space, commitment, and gardening ambitions to justify it, a Bolens rototiller might just be the game-changing tool you’ve been looking for.
Happy gardening, and may your soil always be loose, rich, and ready for planting!
